
Proper waist cincher correct wearing technique is defined as selecting the right size, positioning the garment on your natural waist, and fastening it with gradual, even compression. Done right, a waist cincher smooths your silhouette without displacing tissue or causing discomfort. Done wrong, it rolls, pinches, and creates the very bulges you were trying to avoid. This guide covers every step from measuring your waist accurately to troubleshooting common fit problems, so you get real results every time you wear it.
How to determine the correct waist cincher size and fit
Shapewear sizing is entirely separate from your clothing size. Shapewear must be sized from individual body measurements only, never from the number on your jeans or dress label. That distinction matters more than most people realize, because a size 8 dress and a size 8 waist cincher can fit completely differently on the same body.
Measure your natural waist at the narrowest point, which sits 1–2 inches above the navel. Do not hold your breath while measuring, and do not pull the tape tight. A relaxed, accurate reading gives you the number that actually matches the garment’s compression zone.
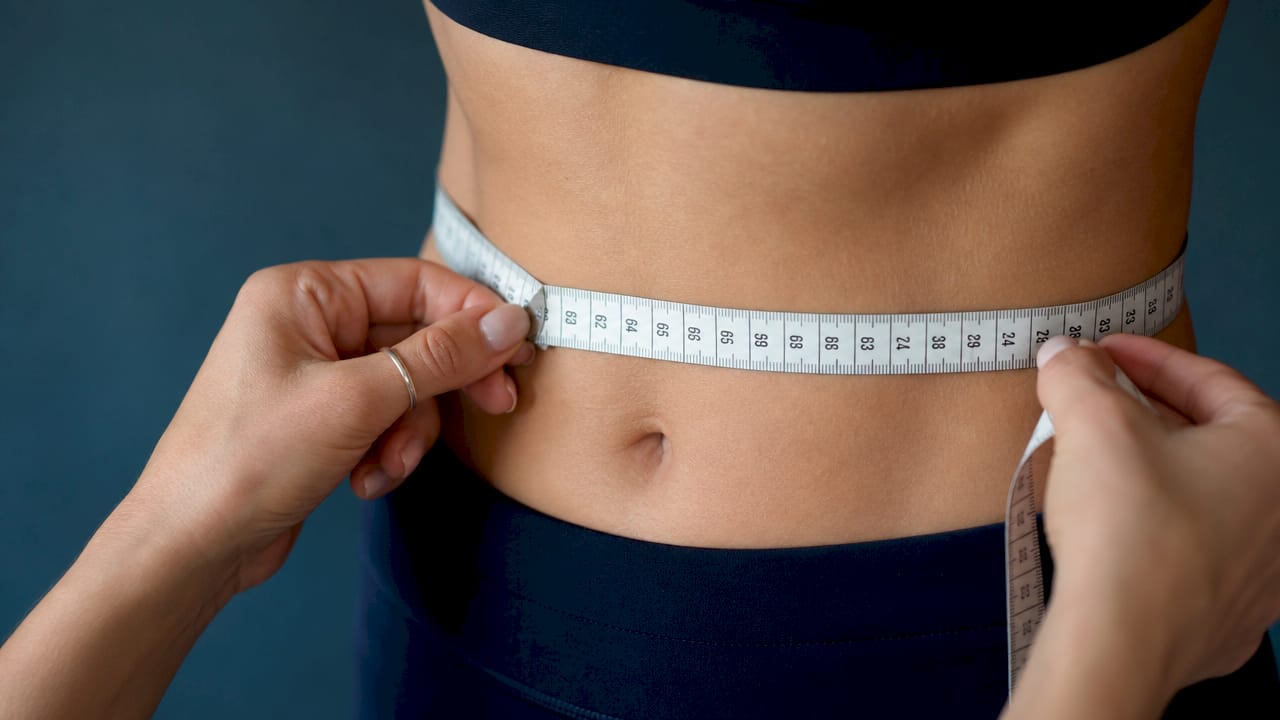
Use all four key measurements: bust, waist, hips, and thighs. Then select the size that matches your largest measurement. This prevents the most common fit failure, which is compression that works in one zone but creates a new bulge in another.
| Measurement point | Where to measure | Key tip |
|---|---|---|
| Natural waist | 1–2 inches above navel | Measure relaxed, no breath-holding |
| Hips | Fullest part of hips and seat | Keep tape parallel to floor |
| Bust | Fullest part of chest | Wear a non-padded bra |
| Thighs | Fullest part of upper thigh | Measure both sides, use the larger |
Pro Tip: When your measurements fall between two sizes, always size up. A slightly looser cincher shapes effectively and stays comfortable all day. A slightly too-small one rolls, pinches, and needs constant adjustment.
Incorrectly sized shapewear causes soft tissue to displace above or below the compression zone, creating new bulges instead of smoothing them. Correct sizing is the single biggest factor in whether your cincher works or fights you all day.
What preparation do you need before putting on a waist cincher?
Good preparation takes about two minutes and makes the entire wearing experience easier. Start by checking the garment’s orientation. Tags are typically sewn at the top back, and closures (hooks, zippers, or laces) run up the front or side. Putting it on upside down is more common than you’d think, and it throws off the compression zones entirely.
Wearing a liner or base layer under your cincher reduces skin irritation and fabric friction significantly. A smooth, fitted camisole or bodysuit liner works well. This also keeps the garment cleaner between washes, which extends its life.
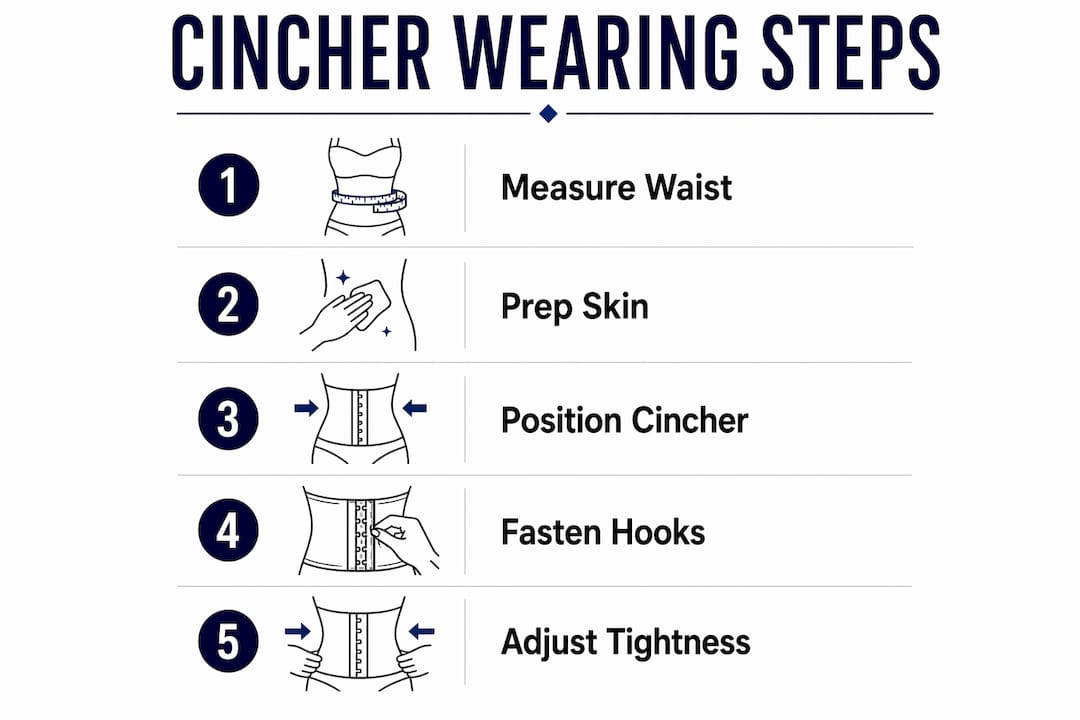
Posture matters before you even step into the cincher. Standing straight with a relaxed abdomen lets the garment settle into the correct position without fighting your body’s natural alignment. Slouching while fastening shifts the compression zone off-center.
Here is a quick preparation checklist before you start:
- Confirm the garment is right-side up with closures facing the correct direction
- Put on your liner or base layer first
- Stand in front of a mirror with good lighting
- Relax your shoulders and abdomen before stepping in
- Have the garment fully unhooked, unzipped, or unlaced before putting it on
Pro Tip: Do a few gentle side stretches and torso rotations before putting on your cincher. Loosening the muscles around your midsection makes the garment easier to position and more comfortable from the first minute.
Step-by-step guide to putting on and fastening a waist cincher
Correct fastening is where most people go wrong, even after getting the size right. Rushing the closure creates uneven compression, which leads to rolling and visible lines under clothing.
- Step into the cincher or wrap it around your torso, depending on the style.
- Position the top edge at your natural waist, 1–2 inches above the navel.
- Smooth the fabric flat against your skin before closing anything.
- Begin fastening at the bottom or middle of the closure, not the top.
- Work upward gradually, tightening each hook, zipper section, or lace loop one step at a time.
- Check that the waistband lies flat with no folding or rolling at the edges.
- Run your fingers along all compression zones to confirm the fabric is smooth with no bunching.
- Check leg openings or lower edges for pinching, and adjust as needed.
Gradual tightening during fastening prevents discomfort and distributes compression evenly across the torso. Pulling everything tight at once creates pressure points and pushes tissue upward.
Different closure types require slightly different handling. Here is how they compare:
| Closure type | Advantage | Caution |
|---|---|---|
| Hook-and-eye | Stepwise tightening, highly adjustable | Check each hook is fully seated |
| Zipper | Fast to put on and remove | Less adjustable once closed |
| Laces | Most precise fit customization | Requires patience; uneven lacing causes asymmetric compression |
Pro Tip: Fasten hooks starting from the loosest row first. Once you are comfortable, you can move to a tighter row over time as your body adjusts. Never start on the tightest setting.
What are the most common mistakes when wearing a waist cincher?
The most frequent mistake is choosing a size that is too small. Many people assume a tighter cincher produces faster results. The opposite is true. A cincher that is too small displaces tissue, rolls constantly, and causes discomfort that forces you to take it off early.
Wearing a waist cincher that is too small does not accelerate shaping. It pushes soft tissue above and below the compression zone, creating new bulges and putting unnecessary pressure on your ribs and abdomen. If you feel pain, numbness, or difficulty breathing, remove the garment immediately and reassess your size.
Watch for these signs that something is off with your fit or technique:
- The waistband rolls down within the first hour. Rolling indicates the cincher is too small for your body volume and cannot be fixed by adjustment alone.
- You are pulling and tugging at the garment throughout the day. Frequent adjustments signal poor fit or incorrect positioning.
- Visible bulges appear above or below the garment’s edges.
- The closure gaps or strains under normal movement.
- You feel numbness, tingling, or shortness of breath.
Quick fixes for common problems:
- Rolling waistband: Size up and re-measure your natural waist.
- Visible bulges: Check that you selected the size matching your largest measurement.
- Constant adjustments: Reposition the garment so the top edge sits exactly at the natural waist.
- Pinching at edges: Smooth the fabric flat before fastening and check leg openings after closing.
How do you stay comfortable wearing a waist cincher all day?
All-day comfort starts with layering correctly. Wearing a smooth base layer under your cincher, as covered in the preparation section, reduces friction and keeps skin irritation at bay. For tips on shapewear layering techniques that work with different outfits, Ilovenichewear has a dedicated guide worth bookmarking.
Hydration supports comfort more than most people expect. Compression garments warm the midsection, and staying well-hydrated prevents the fatigue that comes from wearing any form-fitting garment for hours. Good posture during wear also reduces strain on your back and keeps the cincher in its correct position.
Garment care directly affects how well your cincher performs over time. Hand washing in cool water with a gentle detergent preserves the elasticity of compression fabrics. For a full breakdown of washing and storage best practices, Ilovenichewear’s care guide covers every fabric type.
A few habits that protect both your comfort and your garment:
- Take a 30-minute break from the cincher every 4–6 hours if wearing it all day.
- Never sleep in a waist cincher.
- Listen to your body. Discomfort that does not ease within the first 10–15 minutes of wear means something needs adjusting.
- Store the cincher flat or rolled, never folded on a crease.
Pro Tip: Build your wear time gradually. Start with 1–2 hours per day in the first week, then add an hour each week as your body adjusts. This approach makes all-day wear feel natural rather than forced.
Key Takeaways
Correct waist cincher technique requires accurate body measurements, proper positioning at the natural waist, and gradual fastening to achieve even compression without tissue displacement.
| Point | Details |
|---|---|
| Measure accurately | Use your natural waist, 1–2 inches above the navel, not your clothing size. |
| Size to your largest measurement | Match the size to your biggest measurement across bust, waist, hips, and thighs. |
| Fasten from bottom up | Start closures at the bottom or middle and work upward for even compression. |
| Rolling means wrong size | A waistband that rolls within the first hour signals the cincher is too small. |
| Build wear time gradually | Start with 1–2 hours daily and increase slowly to avoid discomfort. |
What I have learned from years of watching people wear waist cinchers wrong
The single most consistent mistake I see is people treating a waist cincher like a quick fix they can force into working by going smaller. Sizing down feels logical. It does not work. The compression zone shifts, tissue moves where it should not, and the garment spends the day fighting the body wearing it.
The second thing I notice is how rarely people measure themselves correctly before buying. Most people guess their waist size or use their clothing size. Those numbers are almost never the same as a tape measure at the natural waist. That one small error at the start creates every problem that follows.
What actually works is patience. Wearing a cincher correctly is a skill that takes a week or two to feel natural. The fit gets easier to read, the fastening gets faster, and your body adjusts to the compression. People who stick with the correct technique consistently get the results they were hoping for. People who force it usually give up after a frustrating week.
One thing most guides skip: the base layer is not optional for comfort. It feels like an extra step, but it changes the entire wearing experience. Skin irritation from direct fabric contact is the number one reason people stop wearing their cincher mid-day. A simple fitted camisole underneath solves that completely.
— I
Waist cinchers worth wearing, found at Ilovenichewear
Finding a waist cincher that actually fits your measurements and feels good all day is easier when you shop with sizing guidance built into the experience.

Ilovenichewear carries a curated collection of waist cinchers and shapewear selected for fit, comfort, and real-world wearability. Each product listing includes sizing guidance so you can match your measurements to the right garment before you buy. Whether you are new to shapewear or looking to upgrade to something more comfortable, the collection has options across compression levels and closure styles. Browse the full range and find the fit that works for your body.
FAQ
How do I measure my waist for a waist cincher?
Measure your natural waist at the narrowest point, 1–2 inches above your navel, with a relaxed abdomen and without holding your breath. Never use your clothing size as a substitute for this measurement.
What does it mean if my waist cincher keeps rolling down?
Rolling within the first hour means the cincher is too small for your body volume. No amount of adjustment fixes this. Size up and re-measure before buying a replacement.
How tight should a waist cincher feel when first put on?
A correctly sized cincher feels snug and supportive but never painful or restrictive to breathing. If you feel numbness, tingling, or cannot take a full breath, the garment is too small or fastened too tightly.
How long should I wear a waist cincher each day?
Start with 1–2 hours per day in the first week and increase gradually as your body adjusts. Take breaks every 4–6 hours during longer wear sessions, and never sleep in a waist cincher.
Can I wear a waist cincher directly against my skin?
You can, but wearing a smooth liner or fitted camisole underneath reduces skin irritation and fabric friction significantly. A base layer also keeps the garment cleaner between washes and extends its life.